As an Amazon Associate I earn from qualifying purchases.
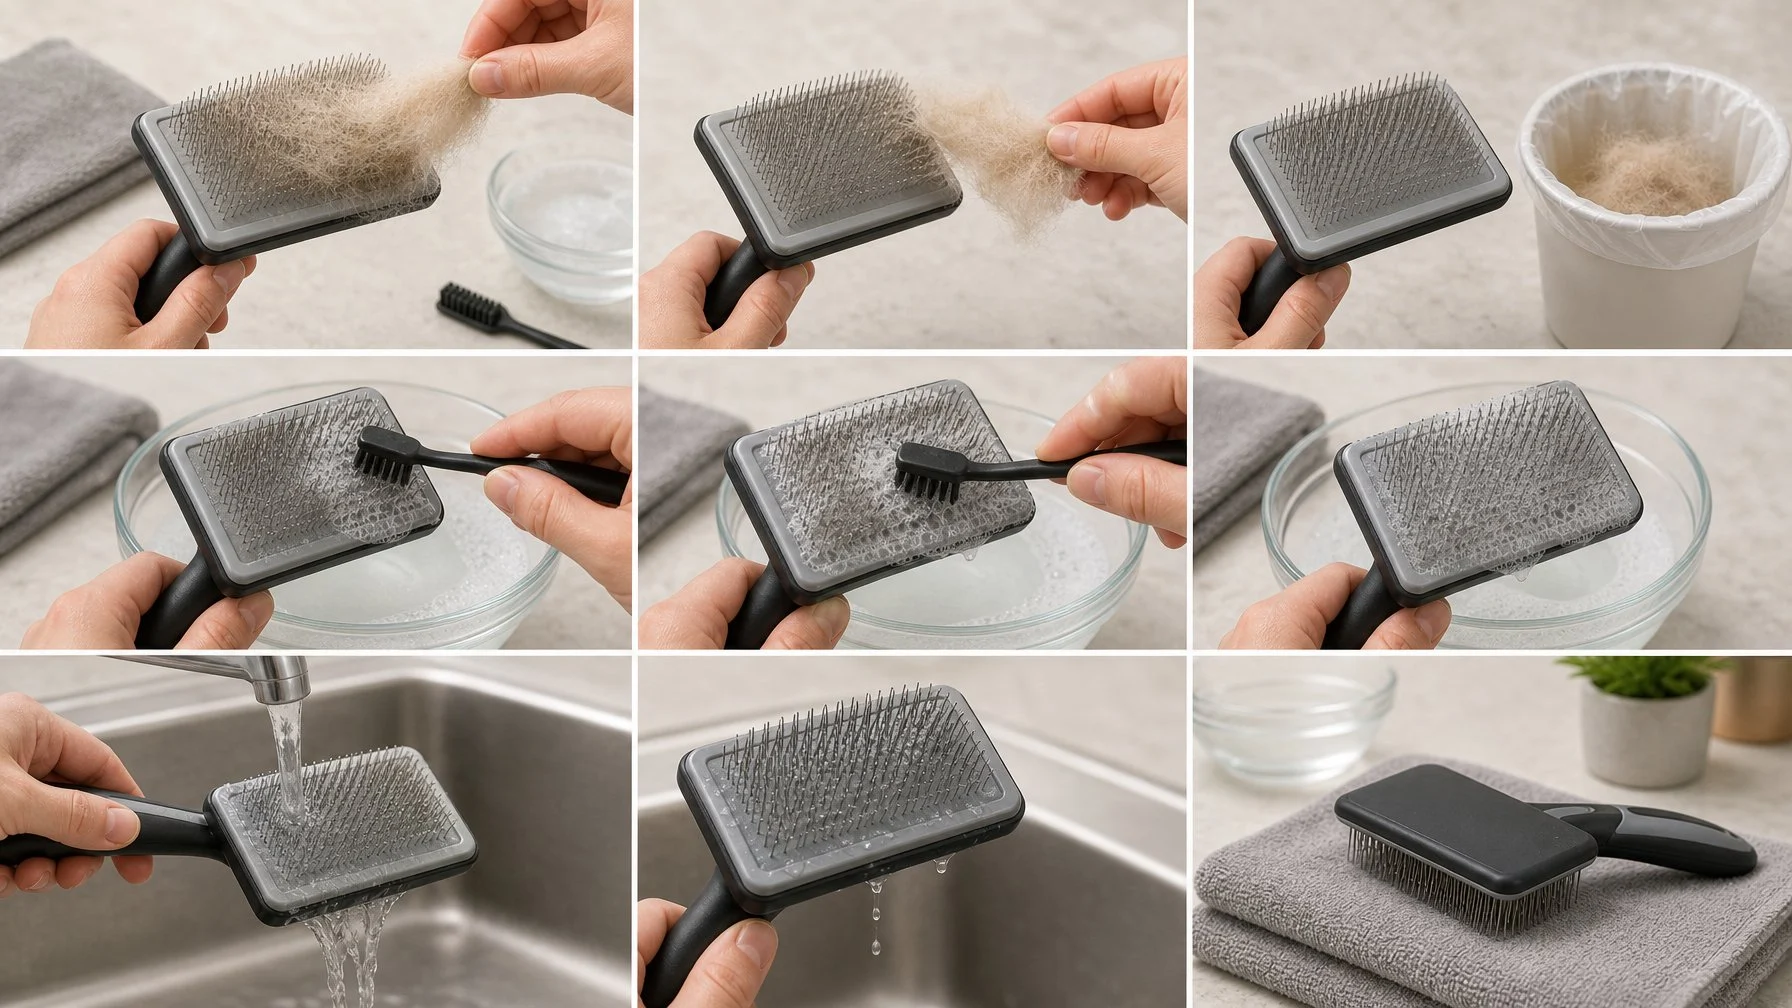
To clean a slicker brush, pull loose fur out in the direction of the pins. Wash the head in lukewarm water with a drop of mild soap, scrub between the bristles with an old toothbrush, rinse until no suds remain, and dry it pins-down before storing.
That’s the short version. But a slicker brush hides more than fur: skin oils, dander, dried shampoo, and sometimes bacteria sit right at the base of the pins where fingers never reach.
For short-coated breeds like French Bulldogs, a grimy brush pressed against fold-prone, itchy skin can turn a two-minute grooming session into a week of scratching.
Dog Fluffy has spent years writing about gentle grooming for fluffy coats and smooth ones alike. The same rule applies to both: clean tool first, dog second.
The Safe Five-Step Cleaning Method
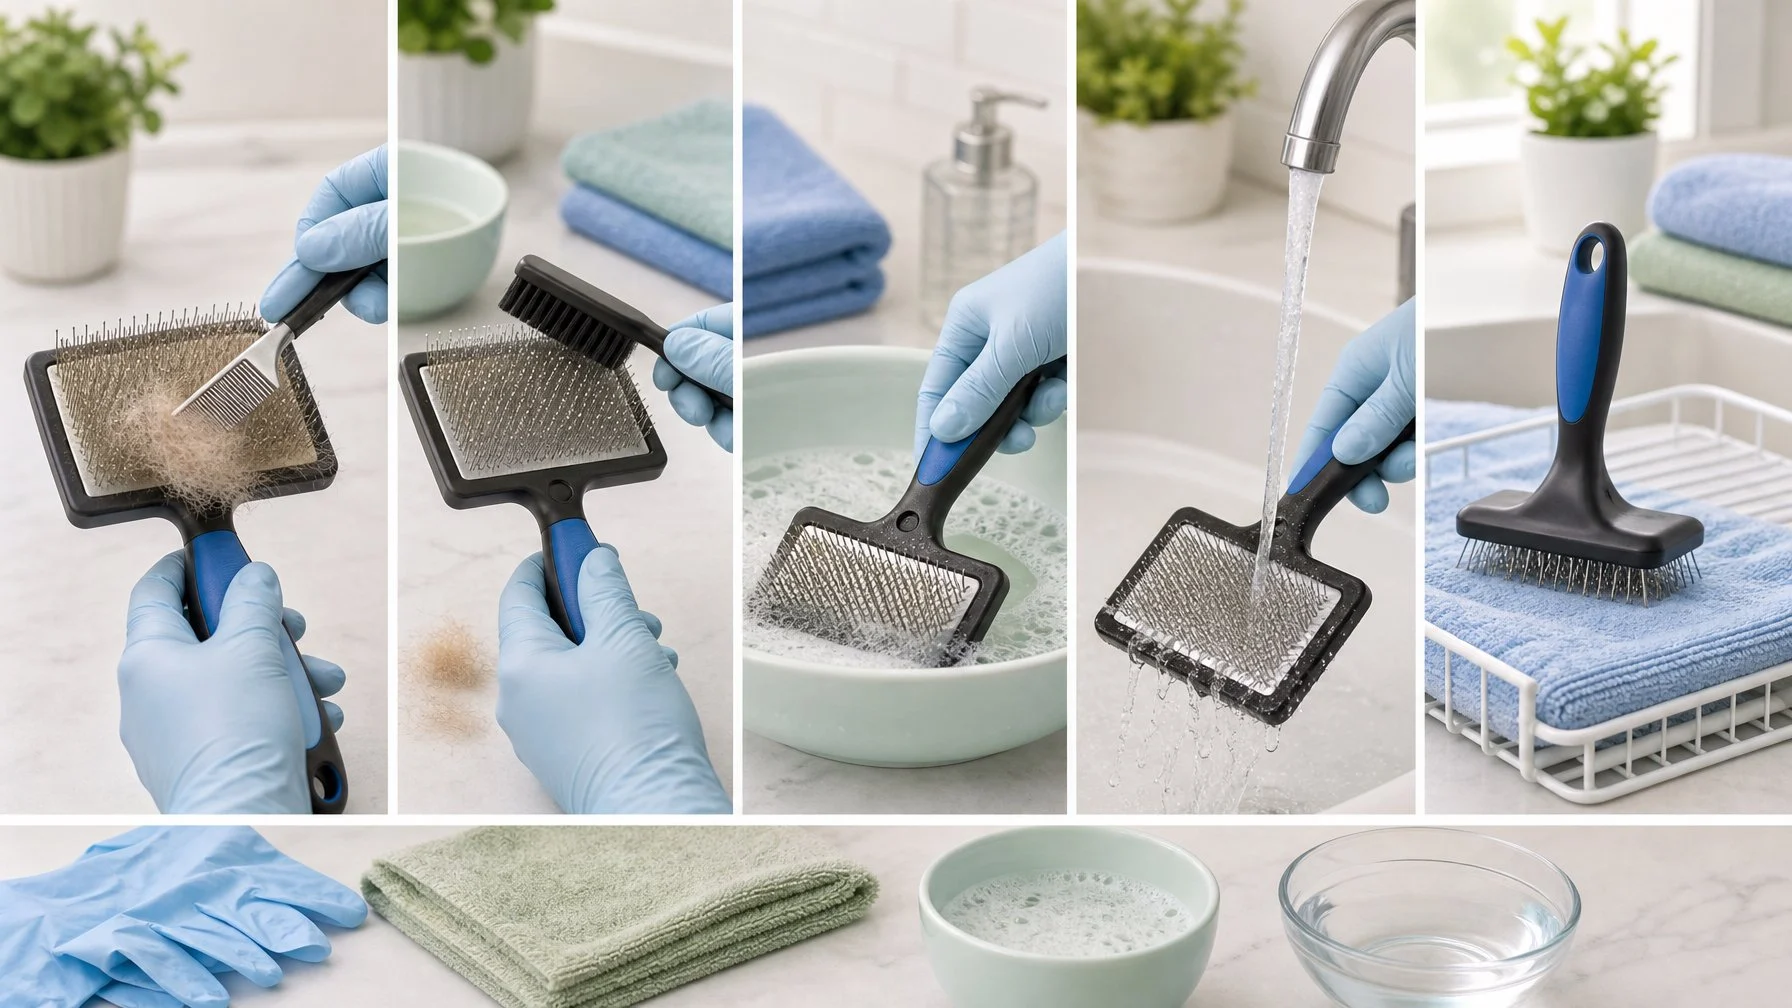
The whole job takes about five minutes. Lift the fur mat off in one piece, mix a weak soap solution, work a toothbrush sideways through the pins, rinse until the water runs clear, then dry it face-down overnight.
Rushing the last step is what ruins brushes.
- Remove loose fur with fingers, a comb, or tweezers, pulling along the pin direction.
- Mix lukewarm water (roughly 500 ml / 2 cups) with 2 to 3 drops of mild soap or pet shampoo.
- Scrub between the bristles with an old toothbrush, moving side to side, not up and down.
- Rinse the brush under running lukewarm water until no suds appear.
- Dry the brush pins-down on a towel for 12 to 24 hours before storing it.
Remove Loose Fur Without Pulling the Pins
Always pull fur out in the same direction the pins bend, never against them. Yanking straight up is how pins get bent, and a bent pin scratches skin.
A wide-tooth metal comb works best here. Slide the teeth in at the base of the pad and lift the packed fur upward in a single sheet.
Tweezers help with the short, stubborn hairs that wrap around individual pins, which is common with Frenchie coats.
Self-cleaning slickers skip this entirely. Press the retract button, wipe the released fur away, done.
Mix a Gentle Cleaning Solution
Skip anything harsh: bleach, disinfectant wipes, and household degreasers can strip the pad’s coating and leave residue against a dog’s skin. A couple of drops of dish soap or a pet-friendly shampoo in lukewarm water is enough.
Lukewarm, not hot. Hot water softens the glue that holds pins in the rubber pad, and softened glue means loose pins later.
If a dog has allergy-prone skin, use the same shampoo they already tolerate. Fewer new ingredients, fewer surprises.
Scrub Between the Bristles
The dirt that matters isn’t on the pins, it’s packed at their base where oil and dander turn into a grey film. An old toothbrush reaches it. Fingers don’t.
Hold the brush at an angle and work the toothbrush across the pin rows, not through them lengthways. Rows of pins bend easily when pushed the wrong way.
For a heavily loaded brush, a dedicated brush cleaning tool or a stiff nylon cleaning brush does the same job faster.
Small circles. Light pressure. That’s it.
Rinse Away Every Trace of Soap
Leftover soap is the most common reason a freshly cleaned brush causes itching two days later. Rinse under running lukewarm water for at least 20 to 30 seconds.
Check by running a wet finger over the pad. If it feels slippery, keep rinsing.
Hold the brush pins-down while rinsing so water flows away from the pad instead of pooling inside it. Shake off the excess before drying.
A hard flick over the sink removes most of the trapped water.
Dry Fully Before Storage
Storing a damp slicker brush is the fastest way to rust the pins and rot the pad. Lay it pins-down on a dry towel in a room with moving air.
Twelve hours is usually enough. Overnight is safer.
Metal pins hold water at the base where nobody looks, so give it longer than seems necessary.
Never use a hairdryer on high heat or leave the brush on a radiator. Heat warps the rubber cushion and the pins shift out of alignment.
A cool fan setting is fine if drying time is tight.
What to Gather Before You Start
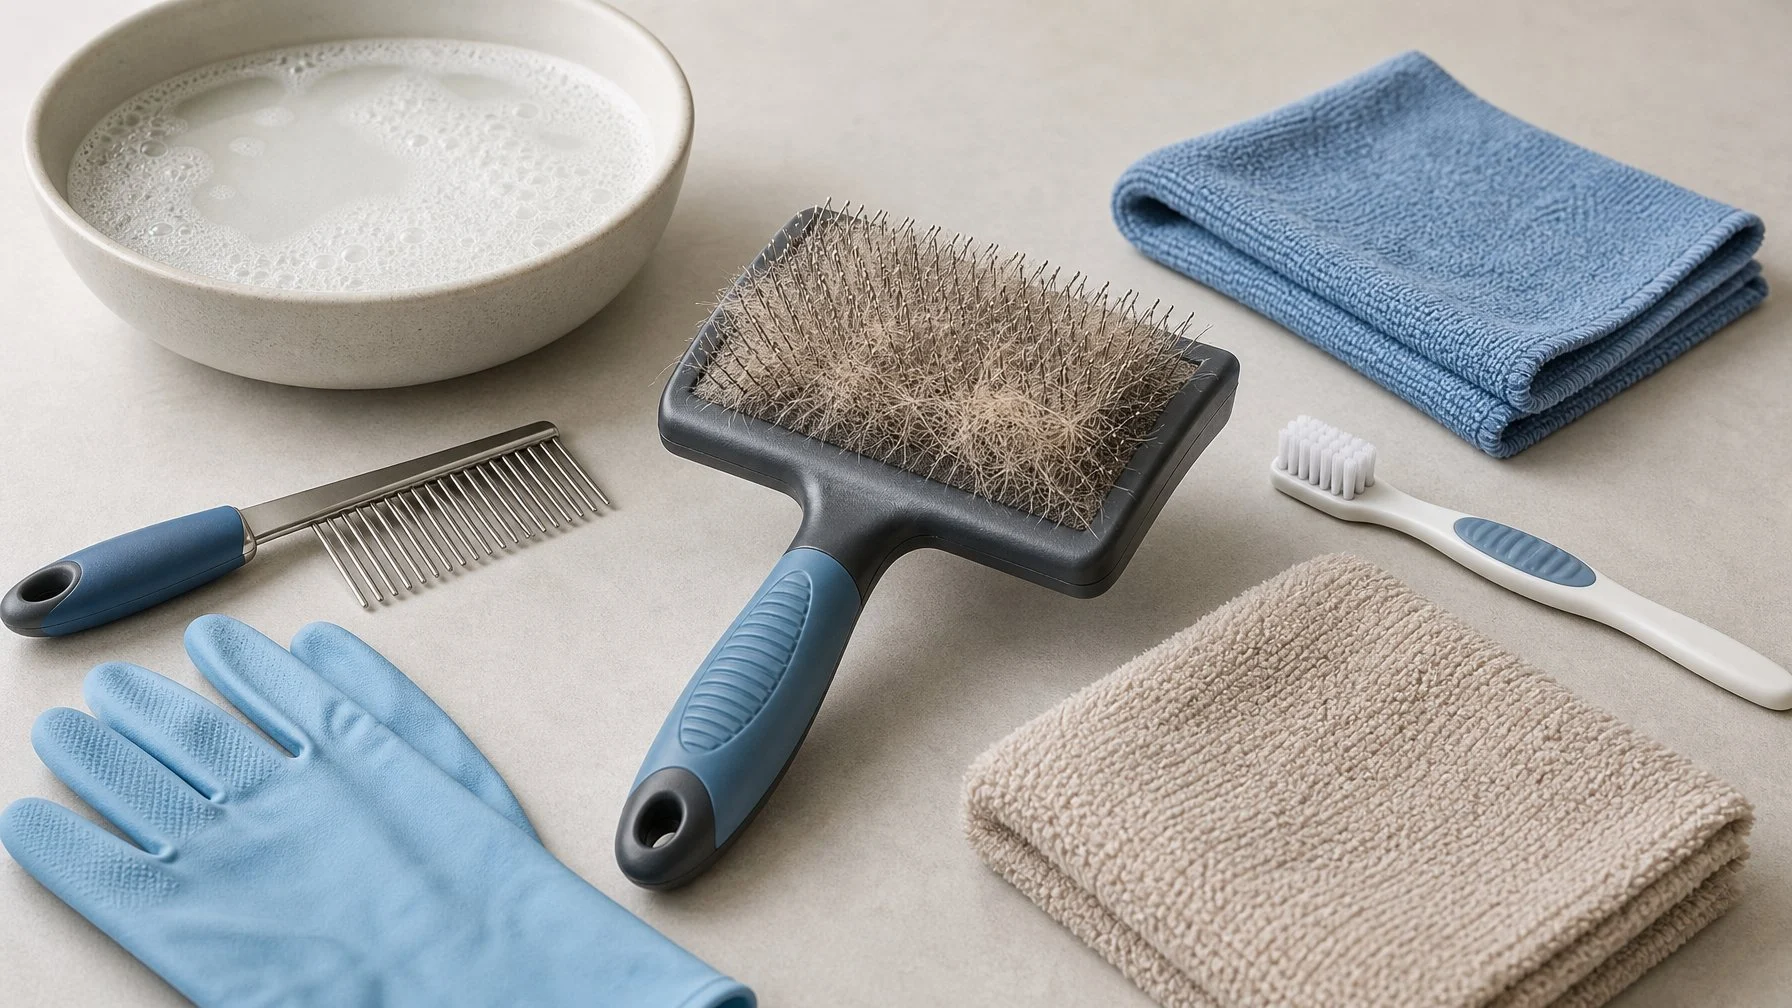
Most of the kit is already in the kitchen: lukewarm water, mild soap, a comb, an old toothbrush, and a towel. A few extras help with packed fur or sticky residue.
One quick check on the handle tells you whether the brush can get wet at all.
Simple Supplies That Work at Home
Nothing on this list needs to be bought from a pet store. The basics do 95% of the work:
- A wide-tooth metal comb or a pair of tweezers
- A bowl with about 500 ml (2 cups) of lukewarm water
- 2 to 3 drops of mild dish soap or pet-friendly shampoo
- An old toothbrush
- A clean towel and a soft cloth
That’s the full grooming tool cleanup kit. The comb matters more than the soap, because most of what clogs a slicker is fur, not grime.
Optional Tools for Stubborn Hair and Residue
Some brushes fight back. Densely pinned slickers used on double coats hold fur like velcro, and a comb alone won’t shift it.
Worth having if that’s the situation:
- A slicker brush cleaning tool (a small rake made for lifting packed fur)
- A brush cleaning mat with rubber nubs to drag pins across
- A pet-safe cleaner spray or brush cleaning solution to loosen oil film
- A second toothbrush kept only for grooming tools
Skip the sprays unless the brush actually smells or feels greasy. Water and soap handle routine cleaning fine. Every extra product is one more thing to rinse off.
Check the Manufacturer’s Water-Care Instructions
Not every slicker brush is washable, and wooden-handled models are the usual exception. Wood swells, splits, and loosens where the handle meets the head.
Check the packaging or the maker’s site before soaking anything. If the brush has a wooden handle, clean only the pin head with a damp cloth and keep the handle dry.
Plastic and rubber-handled brushes are generally safe to rinse. Metal pins are usually stainless steel, but budget brushes sometimes use coated steel that rusts once the coating chips.
When a Quick Clean Needs a Deep Clean
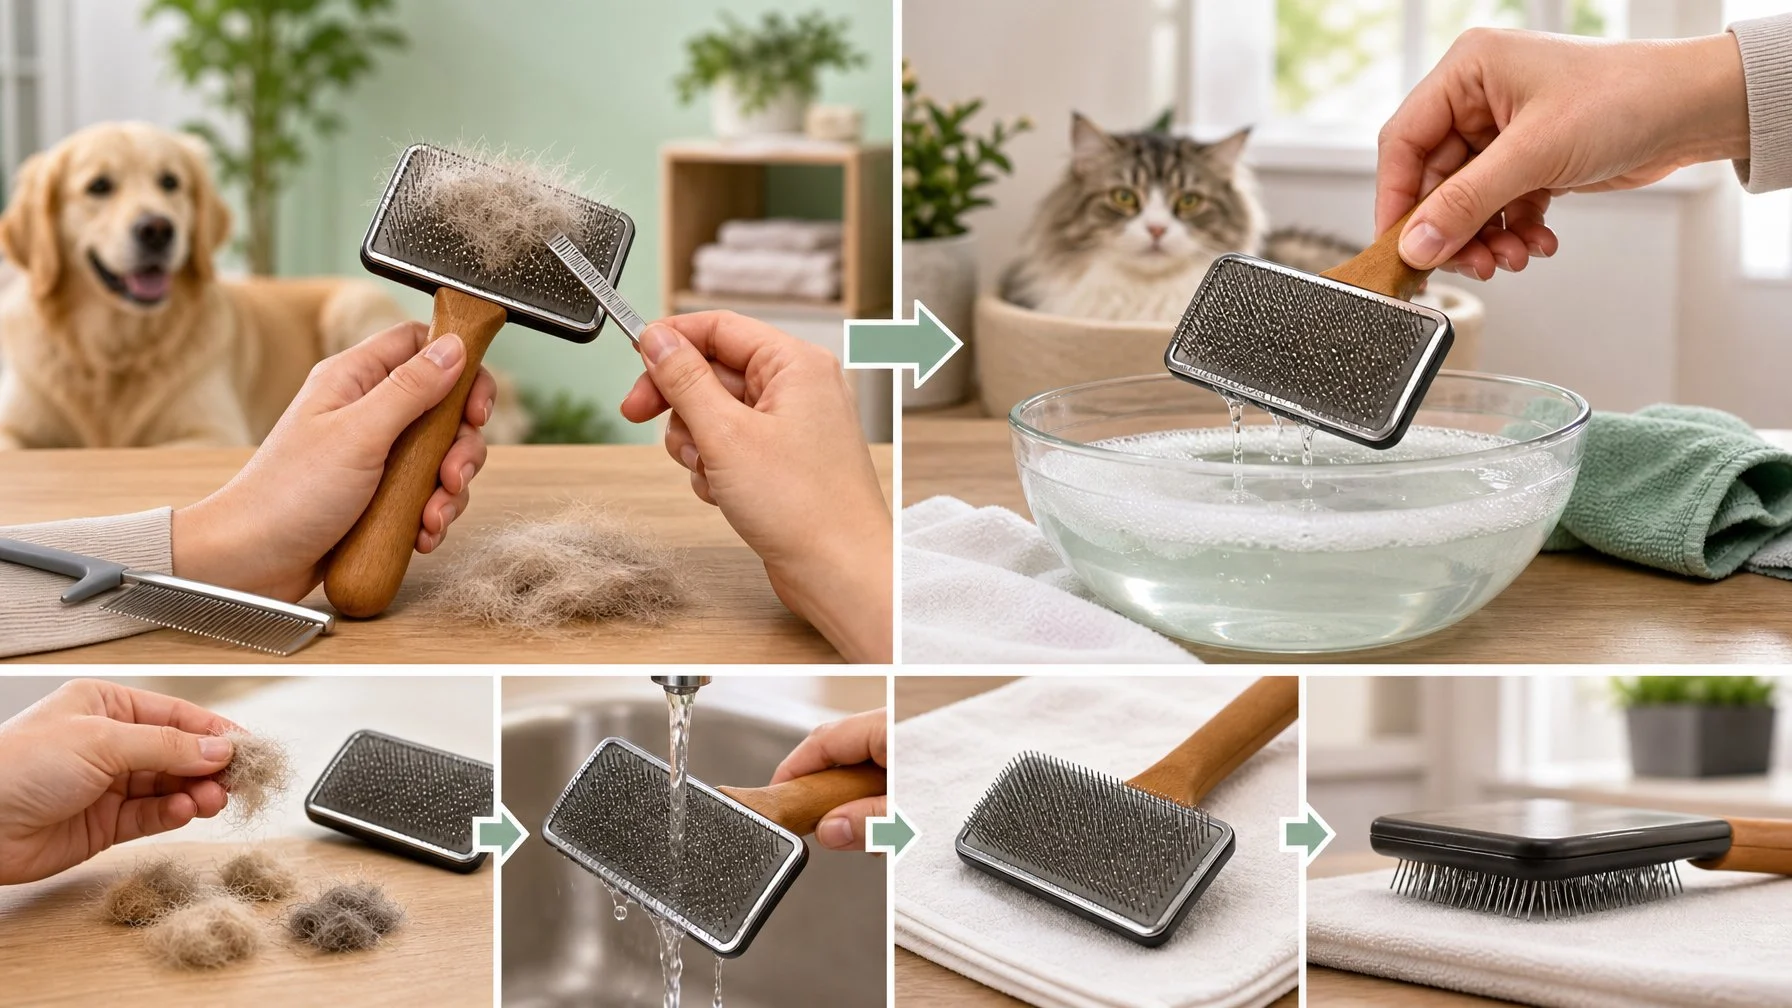
A greasy feel, a faint musty smell, or a grey crust at the pin base means routine wiping stopped working. A 20 to 30 minute soak in warm soapy water clears most of it.
Diluted vinegar handles the rest, though only occasionally.
Signs of Oil, Odour, or Debris Buildup
Deep cleaning is a longer soak used when skin oils, dander, and product residue have hardened at the base of the pins.
Watch for these:
- The pad feels slick or tacky when dry
- A sour or musty smell close up
- Fur no longer lifts out easily
- Visible grey or brown film between pin rows
- The brush drags across the coat instead of gliding
Any two of those together means it’s soak time. Once a month is enough for most dogs, more often during heavy shedding.
How to Soak the Brush Head Safely
Soak the pin head only, never the whole brush. Fill a shallow bowl with warm soapy water to a depth of about 2 cm (¾ inch) and rest the brush pins-down so the handle stays clear.
Leave it 20 to 30 minutes. Then scrub with the toothbrush, rinse hard, and dry pins-down for a full 24 hours.
Warm, not hot. Same reason as before: glue and heat don’t mix.
Using a Vinegar Solution Only When Needed
A one-part white vinegar to three-parts water rinse cuts through oil and knocks back odour, but it’s not an everyday step. Vinegar is mildly acidic and repeated use can dull metal pins over time.
Use it when the brush still smells after a soap soak. Dip, wait five minutes, then rinse thoroughly with plain water so no vinegar smell remains.
One thing to be clear about: cleaning a brush does not treat parasites. If fleas or mites are suspected, that’s a vet conversation, and the brush should be replaced rather than salvaged.
French Bulldog Grooming Notes That Matter
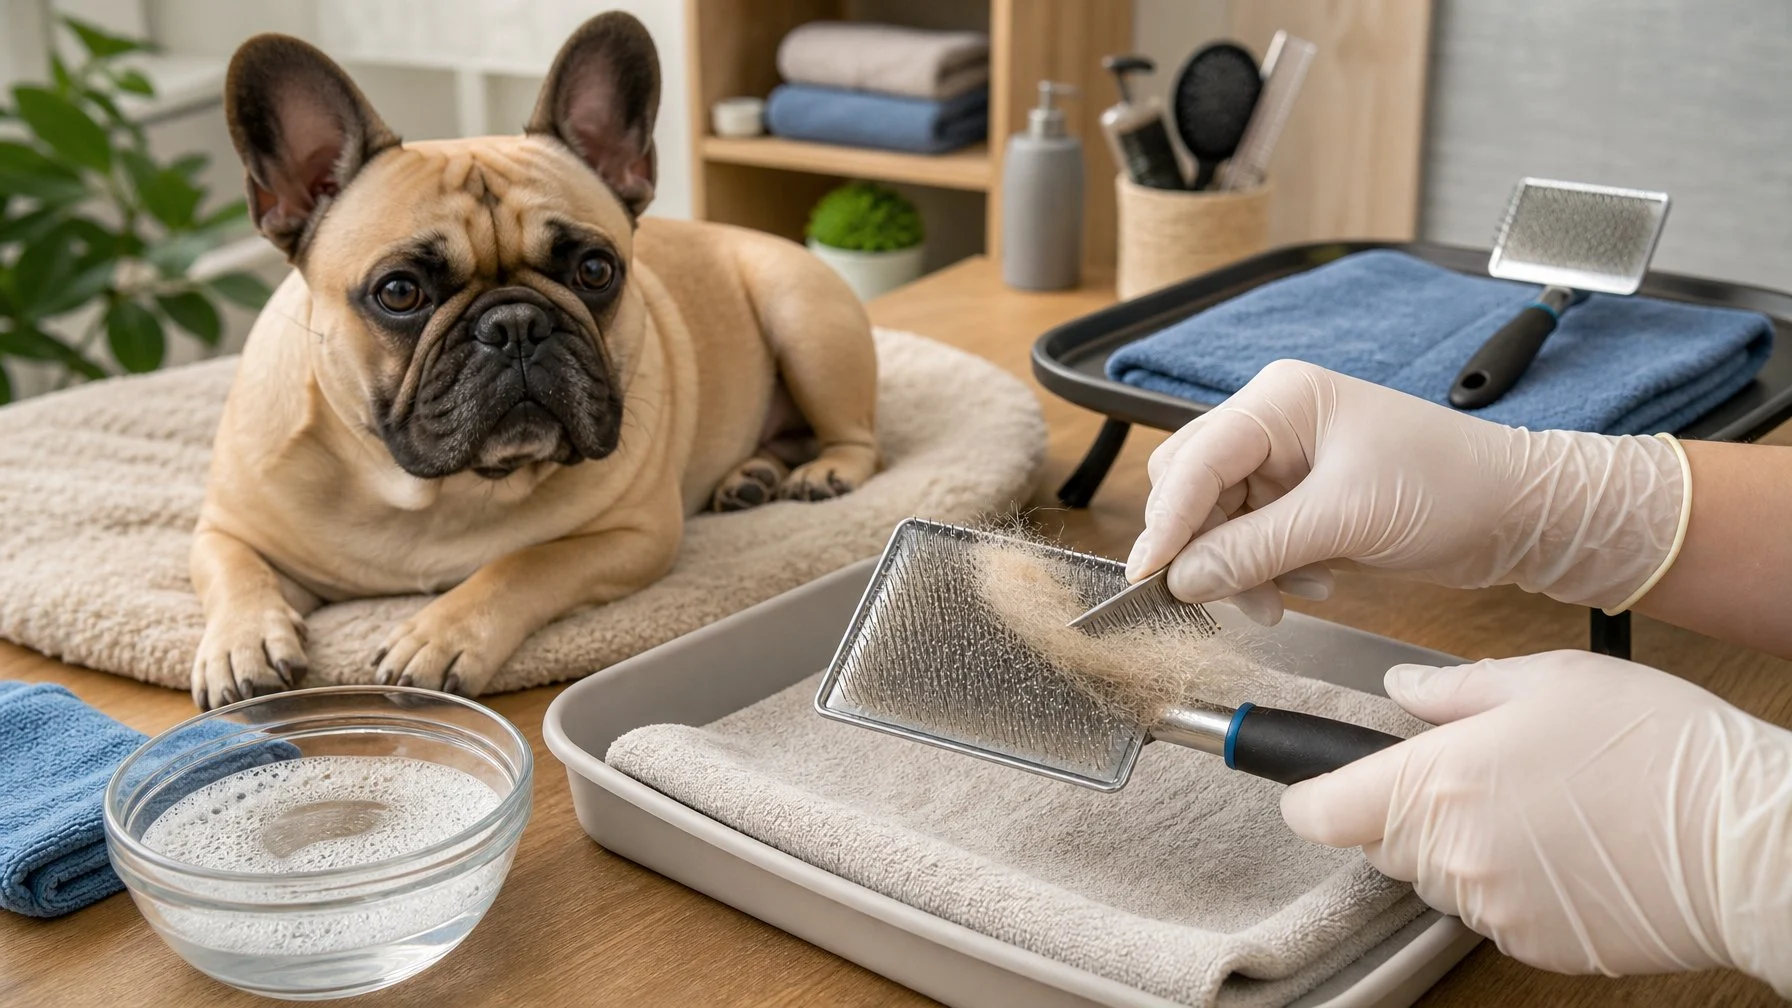
Frenchie coats are short, smooth, and sit right on top of sensitive skin, so pin pressure matters more than pin count.
Sharing brushes between dogs spreads skin trouble fast, and for some Frenchies a slicker isn’t the right tool at all.
Use Light Pressure on Short, Sensitive Coats
A slicker brush on a French Bulldog should barely make contact, because there’s no thick coat to absorb the pressure. The pins reach skin almost immediately.
Signs the pressure is too heavy? Pink lines on the skin after brushing, flinching, or the dog walking away mid-session.
French Bulldog grooming guides usually list a slicker brush alongside a softer option like a rubber curry or a soft bristle brush for exactly this reason.
Short strokes. Follow the hair direction.
Stop before the dog asks you to.
Keep Brushes Separate for Skin Problems or Multiple Dogs
One brush shared across two dogs is a direct route for yeast, bacteria, and skin flakes to travel between them. If one dog has hot spots, itchy patches, or a fold infection, that brush should never touch another dog.
Practical setup for a multi-dog home:
- One labelled brush per dog
- Separate combs and toothbrushes for cleaning each one
- Wash the brush of any dog with active skin issues after every single session
- Store them apart, not jumbled in one drawer
Cross-contamination is invisible until it isn’t. Labels cost nothing.
Choose a Softer Tool When a Slicker Brush Is Too Much
For many Frenchies, a rubber grooming mitt or soft bristle brush removes just as much loose hair with far less skin contact.
The slicker earns its place during heavy shedding, or on dogs with slightly thicker coats around the shoulders and rump.
Fold care is separate. Folds get wiped clean and dried, never brushed.
If a dog tenses up every time the slicker appears, the tool is the problem.
Switching to a mitt often turns grooming from a fight into a five-minute cuddle.
Keep the Brush Working Without Hurting Skin
Clearing fur after every session and washing weekly keeps a slicker usable for years.
Bent pins and rust mean it’s already scratching skin. Where the brush lives between sessions matters almost as much as how it’s washed.
How Often to Clear Hair and Wash the Brush
Fur comes out after every session. Soap and water once a week for regular users, or after every third session for occasional ones.
A rough schedule:
| Task | Frequency |
|---|---|
| Pull loose fur out | After every use |
| Wipe pins with a damp cloth | Every 2 to 3 sessions |
| Full wash with mild soap | Weekly |
| Deep soak | Monthly, or when greasy |
Dogs with skin conditions need the full wash more often.
Long-haired dogs pack fur in faster, so the comb comes out mid-session too. That also helps prevent matting before mats and tangles set in.
Bent Pins, Rust, and Other Signs to Replace It
A bent pin doesn’t glide, it drags, and dragging metal on skin causes the scratches people blame on the dog.
Hold the brush at eye level and look across the pin tops. They should form an even line.
Replace the brush when:
- Pins are bent, splayed, or pointing in different directions
- Any pin is missing or wobbling loose in the pad
- Orange rust shows at the pin base
- Protective tips have worn off, leaving bare sharp metal
- The rubber pad is cracked, hardened, or peeling away
Some brands sell replacement pins for slicker brushes. On cheaper models, a full replacement is usually cheaper than the repair.
Store Grooming Tools Dry Between Sessions
A dry, ventilated spot beats a sealed drawer every time.
Damp air plus metal pins equals rust, even on stainless steel.
Store the brush pins-up so nothing crushes the pad, or hang it by the handle if it has a hole.
Keep it out of the bathroom, where steam from showers keeps everything slightly damp.
A small hook inside a cupboard door works well and keeps the pins away from curious noses.
From Fluffy’s Bowl: clean the brush while it is still damp from the dog. Hair that has dried into the pins takes real effort to shift, and the two minutes it costs you straight after a groom is the difference between a brush you keep and one you replace.
When The Brush Is Past Cleaning
Cleaning buys a brush a lot of life, but bent pins and rust are the end of it. If the checks above point that way, this is a straightforward replacement.
Large Slicker Brush for Doodle and Poodle Coats
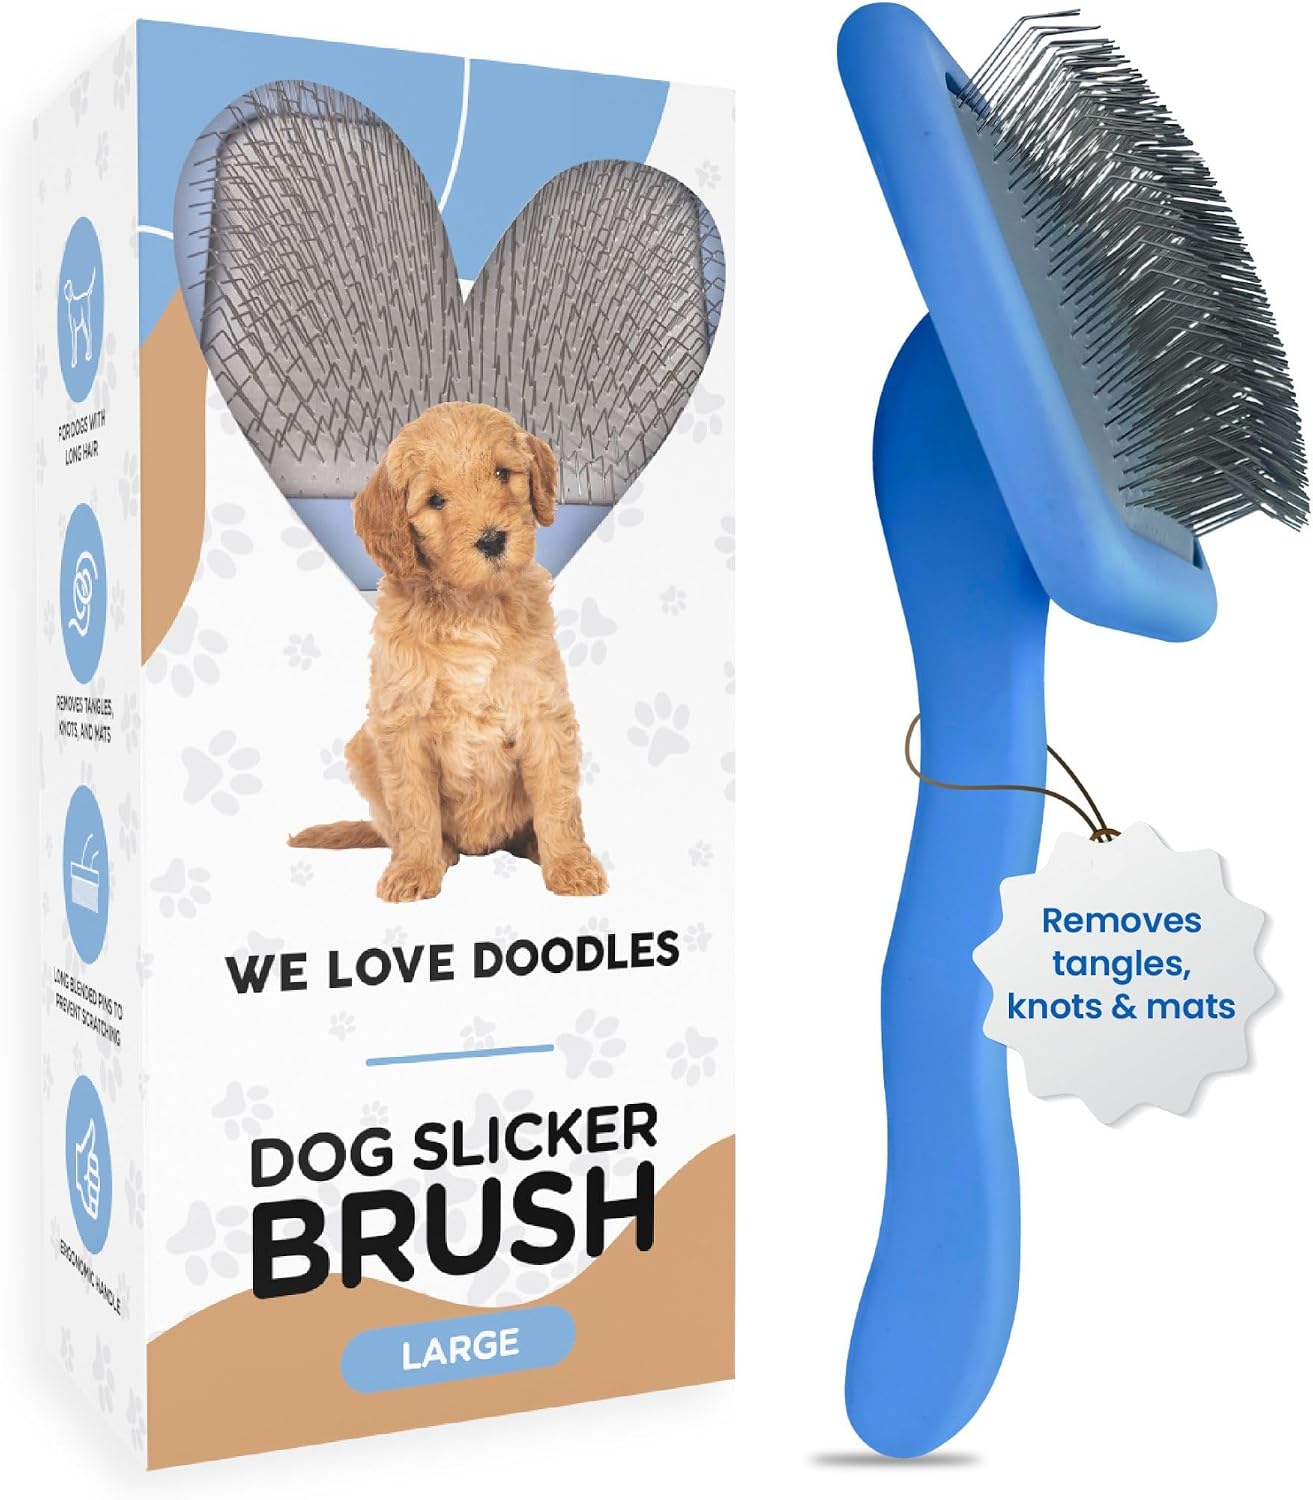
A standard large slicker, the kind this article describes cleaning. Check price on Amazon
| Things We Like | Things We Don’t Like |
|---|---|
| Coated pin tips are gentler than bare ones on a sensitive dog | Too much brush for a short, smooth coat |
| Large head, which is quicker to clear of hair | Coated tips wear through eventually and then need replacing again |
| Straightforward to wash and dry by the method above | A soft brush is the better call for the sensitive coats described above |
Frequently Asked Questions
How do you get stuck dog hair out of a slicker brush?
Slide a wide-tooth metal comb in at the base of the pins and lift the fur upward in one sheet, following the pin direction. Tweezers handle short hairs wound around individual pins. For self-cleaning brushes, press the retract button and wipe the fur away. Never yank fur against the pins, since that bends them permanently.
What’s the safest way to remove dirt and oil buildup from slicker brush pins?
Soak the pin head in warm water with two or three drops of mild soap for 20 to 30 minutes. Scrub across the pin rows with an old toothbrush, then rinse until the pad no longer feels slippery. For lingering odour, a one-part vinegar to three-parts water dip works, followed by a plain water rinse.
Can a slicker brush be washed with warm water and dish soap?
Yes, for plastic or rubber-handled brushes. Use lukewarm water and just two or three drops of dish soap, since hot water can soften the glue holding pins in the pad. Wooden-handled brushes shouldn’t be submerged. Wipe those with a damp cloth and keep the handle completely dry.
How often should a dog’s slicker brush be cleaned?
Pull loose fur out after every session. Give it a proper wash with mild soap weekly if the brush is used most days, or after every third session for lighter use. A monthly deep soak handles oil buildup. Dogs with itchy or allergy-prone skin need their brush washed after each grooming session.
Can you soak a slicker brush without damaging the pad or pins?
Soak the pin head only, in about 2 cm (¾ inch) of warm soapy water, with the handle staying clear. Twenty to thirty minutes is plenty. Longer soaks risk loosening the glue in the rubber pad. Dry pins-down for a full 24 hours afterwards. Trapped water at the pin base causes rust.
Should a slicker brush be used on wet or dry dog fur?
Most of the time, it’s better to use a slicker brush on dry fur. Wet hair tends to stretch and snap, which isn’t great for your dog’s coat. Wet mats can actually tighten up as they dry. It’s usually smart to give your dog’s fur a quick dry brush before bath time to get rid of loose hair. If you absolutely have to detangle a damp coat, try a light conditioning spray. Work in small sections, and go really gentle—almost no pressure at all. How do you clean your dog’s brush? Got any tricks? Drop your thoughts in the comments, and maybe send this to a friend whose slicker brush is basically a furball at this point. This is just general guidance. Always check with your vet for advice about your own dog’s needs.